How to install the "STEMlab SDR transceiver" app on your HAMlab
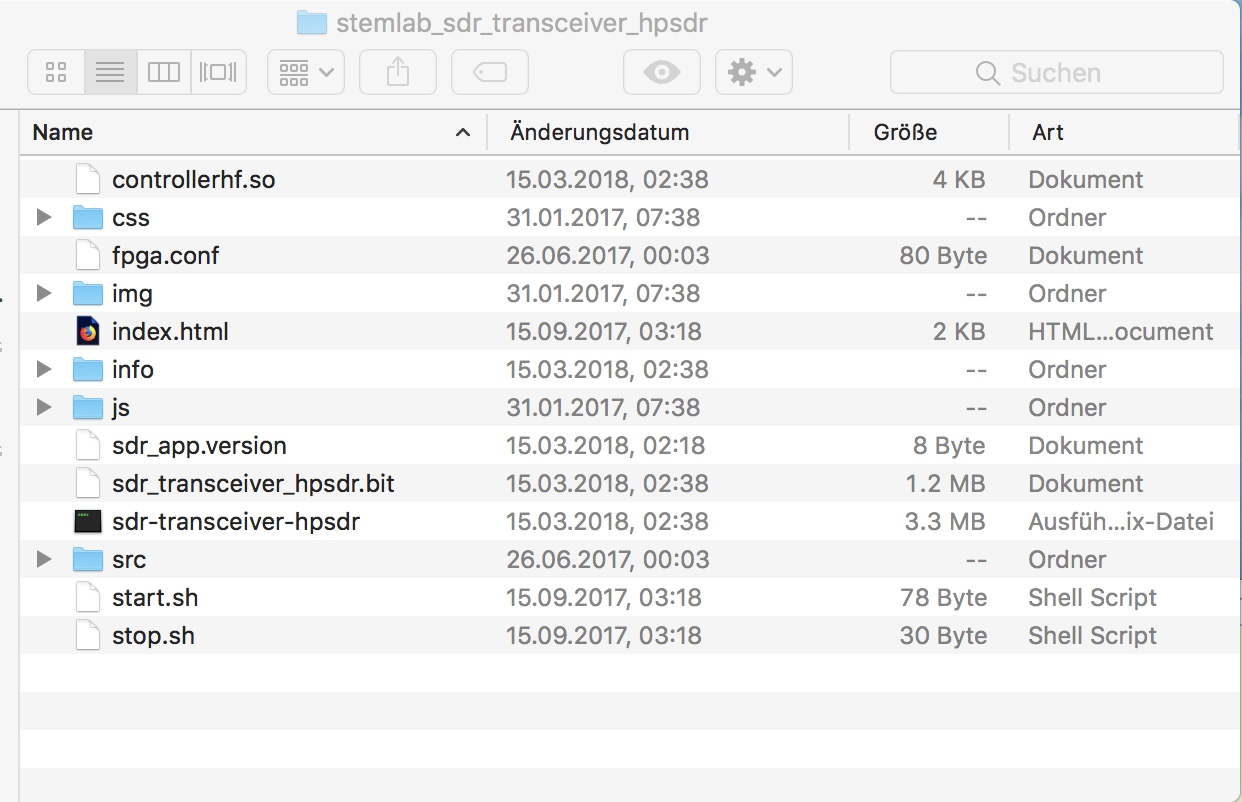
The software comes as a ZIP file, upon extracting it you get a folder
with name
stemlab_sdr_transceiver_hpsdr
and the following contents
It is a good idea to modify the text files (shell scripts) start.sh and stop.sh.
When starting the SDR application,
one should first kill any running sdr transceiver apps that may be still there.
Furthermore, specific for HAMlab, set/reset the GPIO relays to "SDR" mode.
Note that in HAMlab, RedPitaya In/Out can be either routed to the front BNC connectors
(for using the device as an oscilloscope, for example) or to the PA/filter module
(for using is as an SDR), and this must be done
before starting the SDR app.
Therefore, this is how the file start.sh that works on my HAMlab
looks like:
killall sdr-transceiver-hpsdr
hamrf -s
gpiorelay -s
/opt/redpitaya/www/apps/stemlab_sdr_transceiver_hpsdr/sdr-transceiver-hpsdr &
Here, the first three lines are simply copied from stop.sh, so starting the SDR app first resets
everything to a defined state. The file stop.sh reads:
killall sdr-transceiver-hpsdr
hamrf -i
gpiorelay -i
In the distributed (STEMlab) version, there is only the last line present in start.sh and the first line in stop.sh.
The
hamrf and
gpiorelay commands are only used on a HAMlab (not
STEMlab), since HAMlab has a relay board which switches the RedPitaya
between "oscilloscope" and "SDR" mode. For a STEMlab, you hard-wire the
impedance converters and the PA/filter board to the inputs and outputs of the
RedPitaya and need no software switching.
Note:
This relates to the version of
sdr-transceiver-hpsdr from March 15, 2018 (this date can be found in the file
sdr-app.version
in the folder). Later versions require five arguments to the program, in this case the original file
start.sh
reads
/opt/redpitaya/www/apps/stemlab_sdr_transceiver_hpsdr/sdr-transceiver-hpsdr 1 2 2 1 2 &
In this case (of course), this must not be changed, just put the three lines with killall, hamrf, and gpiorelay in front.
After changing "start.sh" and "stop.sh", the whole folder must go somehow to the RedPitaya.
There are two possibilities:
A. Installing directly on the RedPitaya using ssh and scp (Mac, Linux) or putty (Windows)
Log on as root on the RedPitaya. Note that my RedPitaya is configured for a fixed IP address that is 192.168.1.100.
So if working from MacOS or LINUX, the command is
ssh root@192.168.1.100
Under Windows, there
is a "putty" command to do the same but I have no instructions for
this. As password, use "root". Once you are on the red-pitay, simply
issue the command
rw
and then you can leave the RedPitay. Here is a
screen dump how I did it:
MacOS% ssh root@192.168.1.100
root@192.168.1.100's password:
Welcome to Ubuntu 16.04.2 LTS (GNU/Linux 4.4.0-xilinx armv7l)
* Documentation: https://help.ubuntu.com
* Management: https://landscape.canonical.com
* Support: https://ubuntu.com/advantage
##############################################################################
# Red Pitaya GNU/Linux Ecosystem
# Version: 0.97
# Build: 6
# Branch: hamlabab
# Commit: 71c701f93c8bc9b103f72f7a0ba3413c01078e53
# U-Boot: ""
# Linux Kernel: ""
# Pro Applications: +5ee3db375e521fb260b3a3646d9c5b5e5c2a45ff Applications (v0.96-RC3-155-g5ee3db3)
##############################################################################
Last login: Mon Apr 23 14:35:03 2018 from 192.168.1.51
root@rp-f0521b:~# rw
root@rp-f0521b:~# exit
logout
Connection to 192.168.1.100 closed.
[MacChef:~] chwu%
The rw command simply makes the directory in which we have to place the software writable. It is simply an abbreviation for
the command
mount -o rw,remount /opt/redpitaya
which means that the filesystem (which by default is mounted read-only)
is re-mounted with read-write permissions. But it is certainly very
convenient that you only have to type rw.
When you are back on your Macintosh or LINUX system, you go where the
folder stemlab_sdr_transceiver_hpsdr resides and copy it to the
RedPitaya:
scp -r stemlab_sdr_transceiver_hpsdr root@192.168.1.100:/opt/redpitaya/www/apps
This also works under Windows if you use putty.
B. Installing the software directly on the RedPitaya SD card
As an alternative, you can withdraw the SD card from the RedPitaya, put it into an SD card reader and mount this "disk".
On this disk at root level, there is a www folder that contains an apps folder. You have to copy your folder with
name stemlab_sdr_transceiver_hpsdr
into this apps folder. Then you can un-mount the SD card and re-insert it into your RedPitaya.
In both cases:
To check whether installation was successful: connect to your HAMlab via a browser. You now should see both the old
hamlab_sdr and the new stemlab_sdr app:
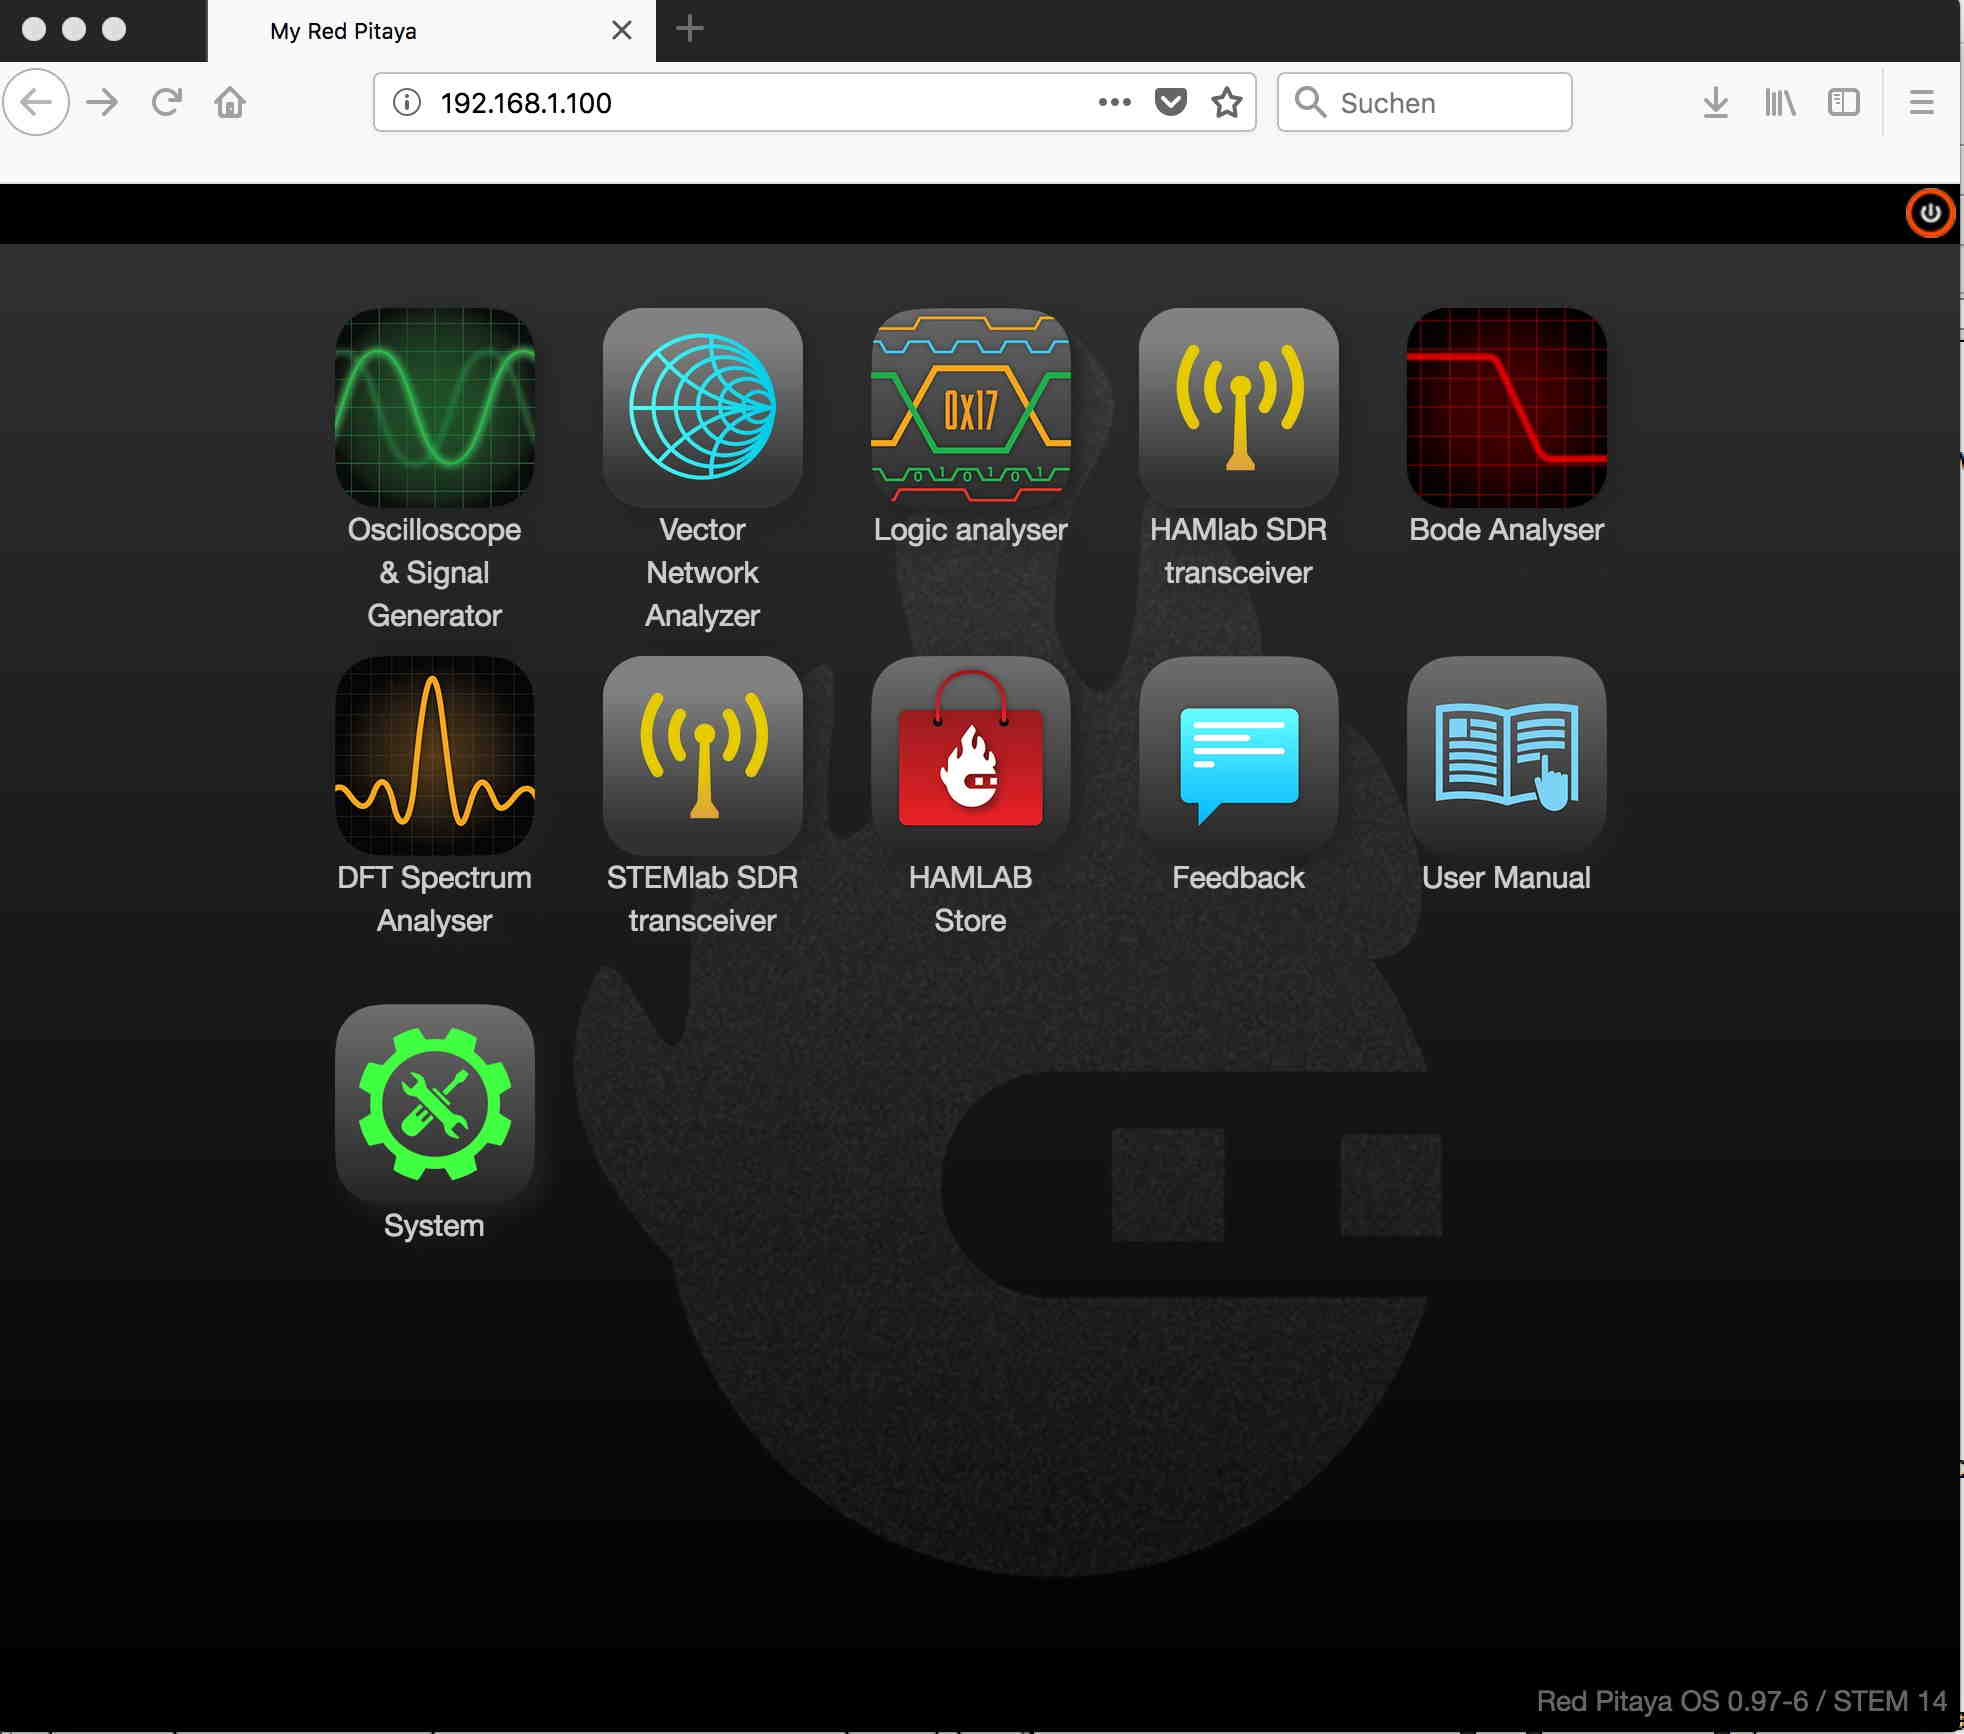
So if you start the SDR application "by hand" from a browser, make sure
to click the icon in the second row (STEMlab SDR transceiver) rather
than the icon in the top row (HAMlab SDR transceiver). If you use
piHPSDR, the app can be started from withih piHPSDR, this program makes
STEMlab the default if both are available. If you use PowerSDR or any
other software which starts the app automatically but you cannot
control which one, it is best to remove the
hamlab_sdr_transceiver_hpsdr directory from the RedPitaya SD card.
DL1YCF, August 2018.