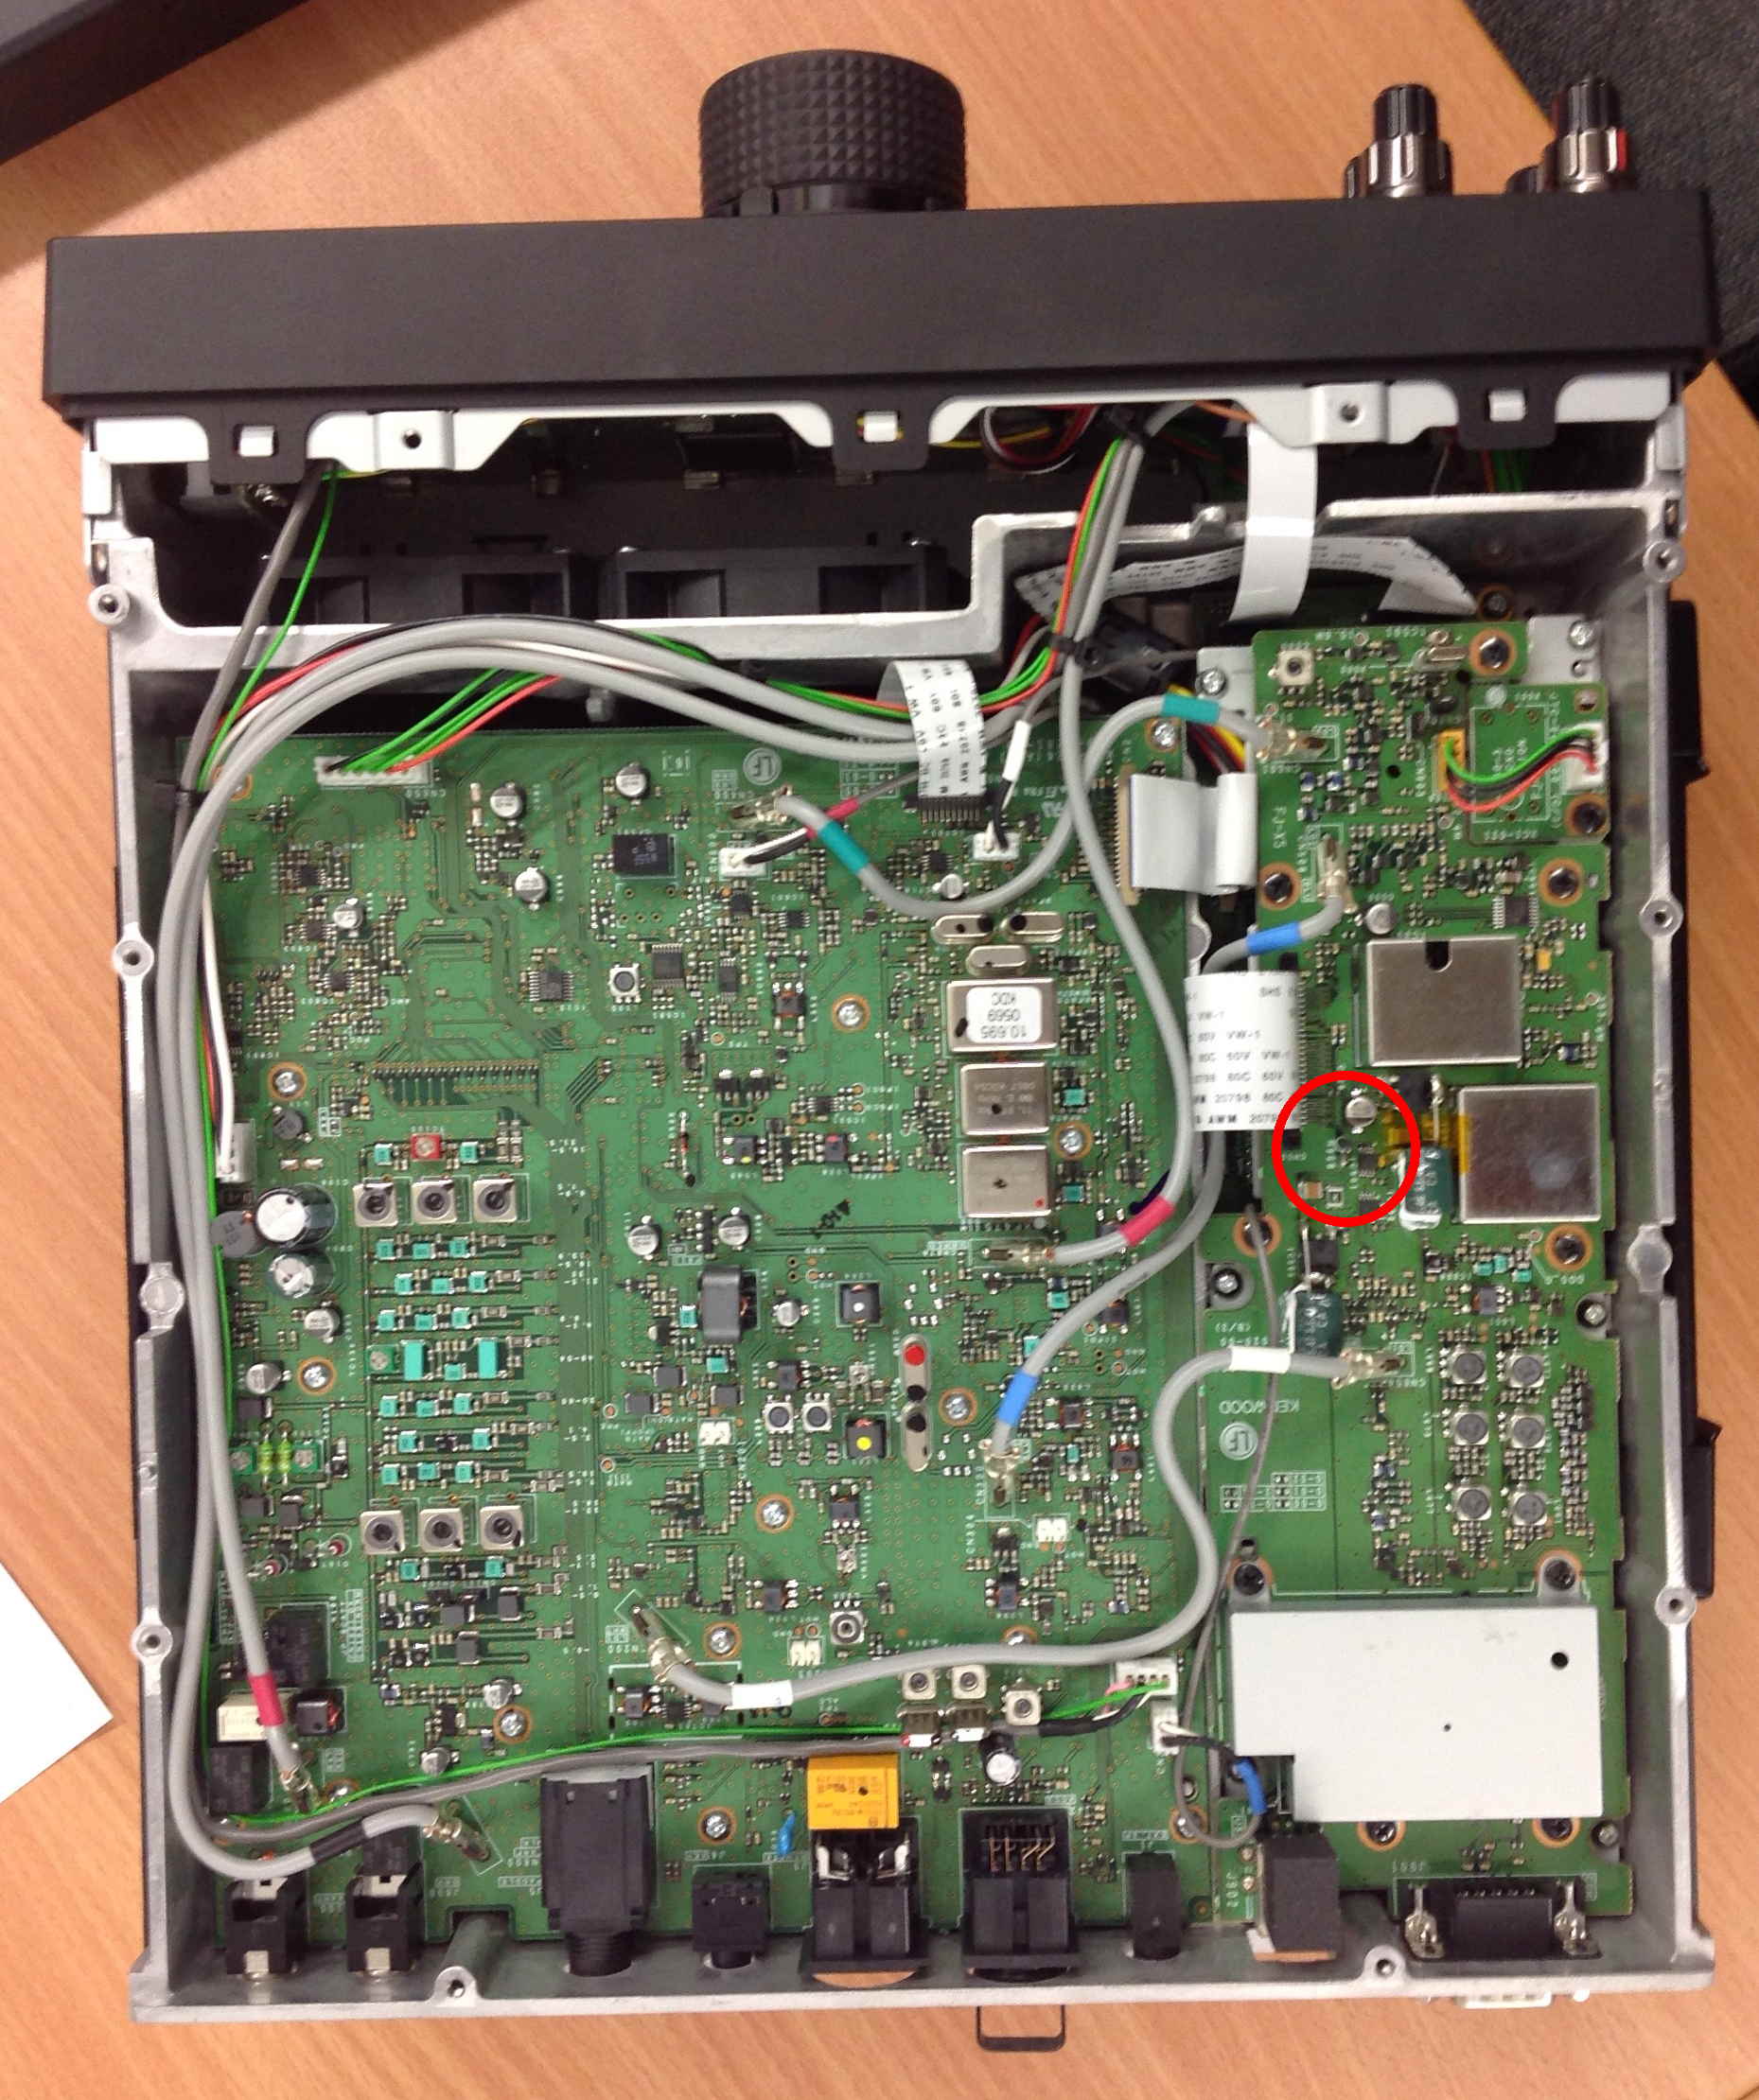
So first remove the bottom cover. This is secured by 10 screws (6 on the bottom, and 2 on each side). After this, the TS590sg lies on your Desk as shown in the first picture.
The two pictures have a fairly high resolution, so if you download them, you should see every detail.
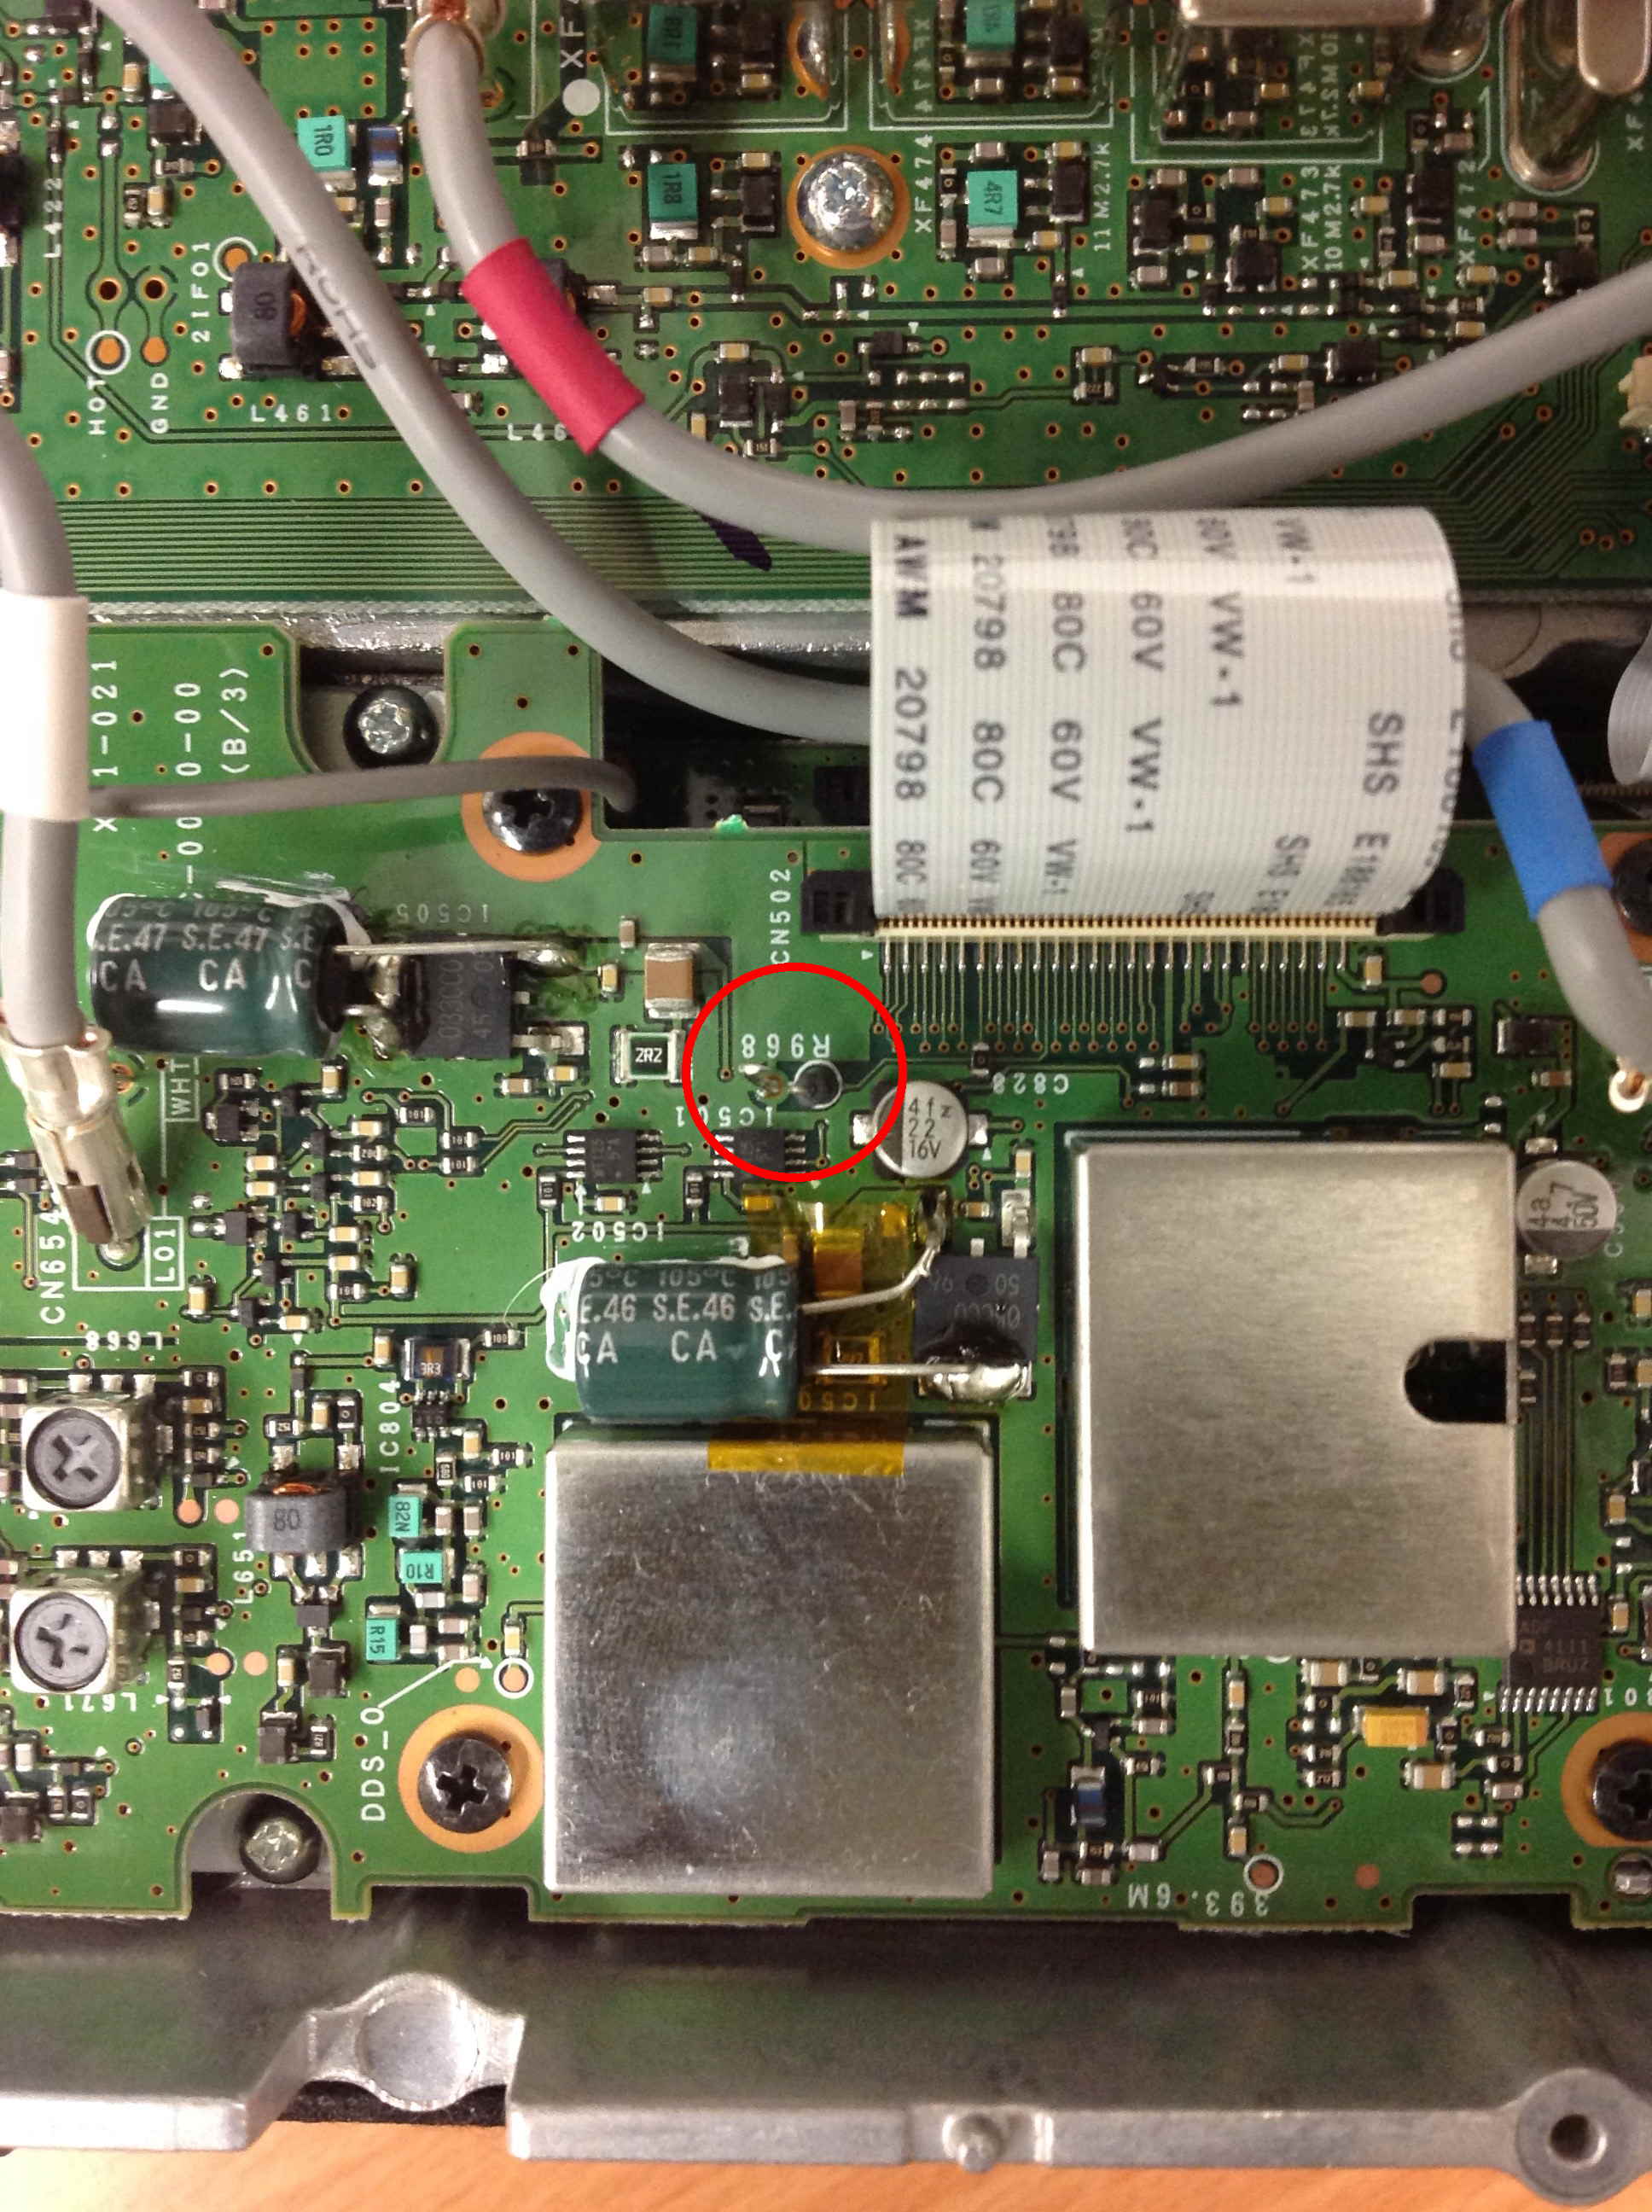
On the second photo, you see the jumper (in the red circle) just after being cut.
Then, bring the bottom cover in place again and tighten it with the 10 screws.
Now, BEFORE powering on the TS590sg, press the "A<>B" button and hold it, THEN power up, wait few seconds, let the "A<>B" button loose and press it again. This makes a full reset of the rig to factory settings.
For example, if digimodes don't work after this, do not panic: you have to activate USB AF input through menu #69, for example, the default is to accept AF signals from the ACC jacket.